Vegvísir, the 2026 Breyer Ambassador Model!
Our special thank-you to the volunteers that help make Breyer's events the best they can be!

Surface scratches are fairly easy to cover up with a bit of paint, but damaged eyes require a bit more work. Rebuilding an area like an eye can be best handled with Liquitex Modeling Paste. This product is great for covering pinholes, sealing gouges and repairing minor scrapes because it smooths on easily, adheres to plastic well, and dries strongly.
|
Supply List:
|
 Patient arrives at the horsepital in need of eye repair. Patient arrives at the horsepital in need of eye repair.
|
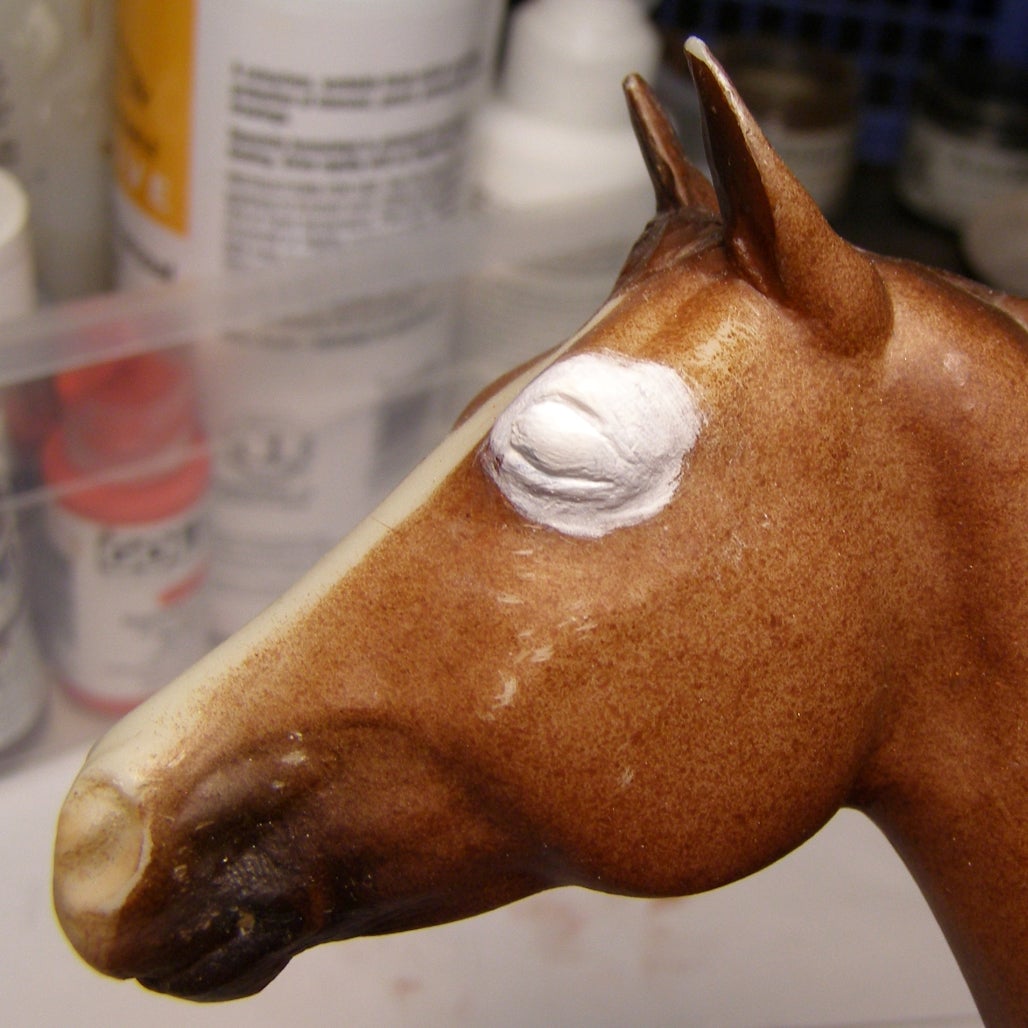
First, take a bit of paste and dab it onto the damaged eye.
 |
 |
| Add modeling paste | Sculpt the eyeball and lid |
Take a damp brush and smooth the paste all around the eyeball.

|
|
Smooth out with a wet brush
|
Make a new eyelid by pressing into the paste. After you are satisfied, let it dry fully, which should take about 24 hours.
Once dry, the eye can be sanded down lightly with 500-grit sandpaper. Sand gently and remove any irregularities or bumpiness.
At some point in this repair you may decide that you want to give your horse a bit of a tweak. You could paint the eye black and call it a day, but making minor custom adjustments, like repainting the eye as realistically as you can, will give your horse some pop without going overboard on a full customization. For an unusual look, we will paint the eye blue.
Important note for model horse showers! If you intend to show your model or keep it as "original finish," your repair should match the model's original eye as closely as possible. By altering the style or color of the eye when repairing, your model will now be considered "custom" and will no longer be eligible to show with original finish models.
Before beginning the painting process, cover the entire eye area with sandable gesso and let dry.
 |
| Sand and spot gesso area |
Three coats should suffice. After the gesso has dried, begin the process by drawing the underside of the lids.
 |
|
Paint black around the eye
|
Then add a bit of red/brown mixture for the corner of the eye. I like to paint a bit of this reddish-brown color around the entire eye for a more realistic effect.
 |
| Paint the corner of the eye |
Next, add some white half moons near the corner of the eye.
 |
| Add the sclera using pure white |
This area will represent the sclera, or "eyewhites." Let all of these earlier steps dry fully before starting on the outer circle of the iris. This outer circle is a mixture of cerulean blue and burnt sienna with just a touch of black. Draw an open circle right in the center of the eye.
 |
| Paint an open circle |
Next, fill in the open circle (or iris) with some dark blue.
 |
| Fill in circle with dark blue acrylic |
On your paint palette, mix a touch of white into your dark blue paint color. This slightly lighter blue color is then added in small circular streaks inside the iris.
 |
| Paint light blue circular streaks |
Then make the light blue color on the palette even lighter by adding more white. Paint a few more streaks into the iris.

|
| Add a few more light blue streaks |
For these steps, you'll need good reference image of a blue eye. I always suggest using real horses for reference, but when you can't find an equine blue eye in real life, check out the web or a photography book. Let all the blue paint dry and then add black in the center, which will be the pupil.
 |
| Paint pupil |
Once the eyeball is complete, it's time to repaint the hair around the eye. For this task I like to use water-soluble oils instead of acrylics because they blend well with the original factory colors and the oils don’t dry as fast as the acrylics do.
The trick to using water-soluble oils is to go slowly. Add a transparent layer of burnt sienna around the eye and let it dry.

|
| Slowly build up the color around the eye |
After it has dried, add more color until the area around the eye is fully blended with the surrounding color.
 |
| Use more oils and dry brush to blend |
For a finishing touch, gloss the eye with Liquitex Gloss Medium.

HOT TIP: You can use a hairdryer to speed up the drying process of acrylics, water-based oils or gesso.

Our special thank-you to the volunteers that help make Breyer's events the best they can be!

We’re sure to win your hearts with this fun sweepstakes for a chance to win Cupid, the 2026 Valentine’s Day plush from Breyer! Cupid is the sweetest pony in the paddock, and he would love to join your herd!...

Explore our new releases, coming soon to your local retailer and BreyerHorses.com!
