Where to Find Breyer This Holiday Season
A guide to nearly 100 physical retailers across 39 states!

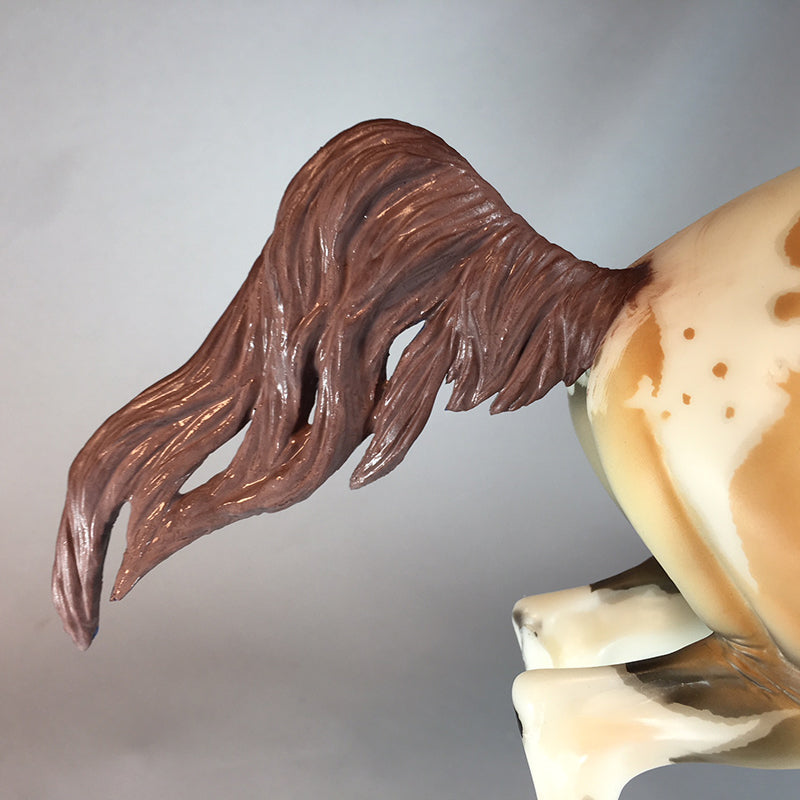
Hair, hands down, is my favorite thing to sculpt. Tails are a part of sculpting where I get to be really creative, and really add some fun to a model. Let's give Bristol the jumper a new look with a fresh, free-flowing tail!
|
Supply List:
|
 |
The first step is to add a wire armature for your tail. There are lots of different types of wire you can use, but I like to use the kinds of wire I can find around the house. Wire hangers work well, but my personal favorite is the bailing wire that comes off of my hay bales. The best part is that it's free!

Starting with a model horse with its tail removed, I drill a hole just large enough to fit my wire through. I feed the wire into the body at least six inches, or 2/3 of the torso length. At the same time, I bend the wire by hand into the general shape I need for my tail.
Next, I cut off the excess wire with wire cutters and continue to refine the shape. At this point, I start bending the wire with a pair of pliers.
Happy with your shape? Me too. Now I’ll tack the wire in place with a small drop of super glue. You can set the glue instantly with a sprinkle of baking soda. I’ll do this a couple more times to secure the wire in place.
 |
 |
 |
Drill a hole for the wire, insert and bend to shape, then set the position with super glue and baking soda.
Now I’m ready for the masking tape. For a Traditional scale tail, I pull tape off the roll in chunks of about 4 to 6 inches. I stick the tape across the wire, then alternate placing more pieces on both sides, placing the sticky sides together. Two to four layers of tape is usually enough. I need the tape to hold its shape, but still be easily cut with scissors.
Next, you need to draw your designed tail shape into the masking tape with a permanent marker. It’s really helpful to start with a photo of a tail you like and draw the general shape of the tail, especially when you are just getting started sculpting tails. After I’m happy with my shape, I cut off the excess masking tape.
 |
 |
Roughing out the shape of the new hairdo with masking tape and a permanent marker.
With my baking soda at the ready, I lightly spread a layer of super glue over my tail shape. I sprinkle the glue with baking soda, and repeat 3 to 5 times or until your shape is rigid without being too thick.

Next, I measure out and mix my clay, because we’ve finally gotten around to actual sculpting. In the hobby, I’ve seen two basic approached to hair: the "tool approach" and the "noodle approach." The noodle approach is pretty much self-explanatory. Using wet clay, roll small noodle shapes and apply them, one at a time, to your tail to mimic the direction of hair.

Now, with the tool approach, the sculptor will smoosh the clay on to the frame of the tail and texture with a sculpting tool. I start with the noodle approach, but finish with the tool approach. I lay out the basic hair direction with noodles, then blend and apply light detailing with my tool.

Feeling overwhelmed? Not sure if you are happy with your sculpting? When I’m not sure about what I’ve sculpted, I put my horse in the freezer for a few hours. I can go do something else and clear my mind before going back to it, because cold temperatures will slow down the hardening process of apoxie. I don’t recommend leaving a horse in the freezer for more than 24 hours as it will still harden in a freezer, just much slower than at room temperature.
The last step to finish off the tail is smoothing. Smoothing has a huge impact on style, with some artists preferring a rougher or more detailed texture, while others want almost none. I smooth using a soft paintbrush and rubbing alcohol or water. Stiff brushes and rubbing alcohol will remove more texture. Soft brushes and water will preserve more texture, while still removing the hardest edges and loose goobers on your tail.

Once you are happy with your sculpting, let the epoxy set overnight. Spray your model with primer, prep, and paint to your heart's desire!


A guide to nearly 100 physical retailers across 39 states!

A collection of exclusive models is now arriving at Tractor Supply stores just in time for the holiday season!

We're making room for exciting new 2026 additions!
